How To Set Up the Microsoft Chatbot Template and Azure OpenAI Service Plugin for Bubble
Published Jun 16 2023 09:42 AM 15.3K Views


1. From your Bubble application that was created by the Microsoft Azure OpenAI Service Chatbot Template, click the "Plugins" button.

Screenshot of: From your Bubble application that was created by the Microsoft Azure Open AI Service Chatbot Template, click the "Plugins" button.

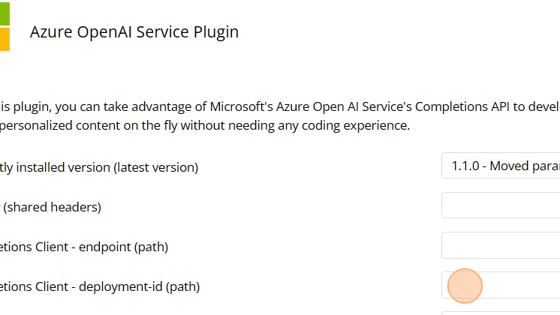
2. If you have multiple plugins, select the "Azure OpenAI Service Plugin" from the list to display the configuration settings for the plugin.

Screenshot of: 2 If you have multiple plugins, select the "Azure Open AI Service Plugin" from the list to display the configuration settings for the plugin.

3. In another browser tab/window navigate to https://portal.azure.com. Log in if necessary, using an account that has the Azure OpenAI Service set up and a model deployed. For instructions on how to do this, please see the guide at: https://aka.ms/setup-gpt-aoai

4. Click the "Search resources, services, and docs (G+/)" search box.

Screenshot of: Click the "Search resources, services, and docs (G+/)" search box.

5. Type "openai."

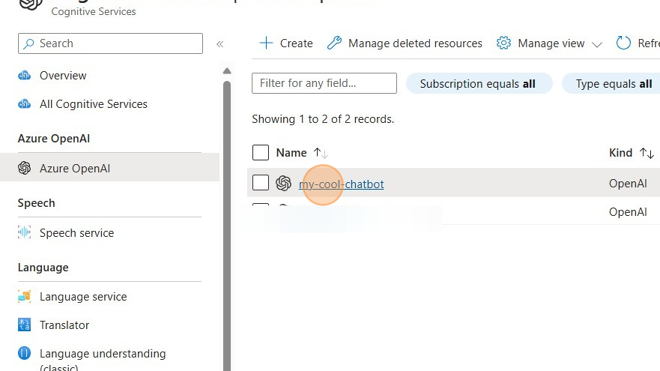
6. Click "Azure OpenAI."

Screenshot of: Click "Azure OpenAI."

7. Select the resource that you wish to use with the plugin.

Screenshot of: Select the resource that you wish to use with the plugin.

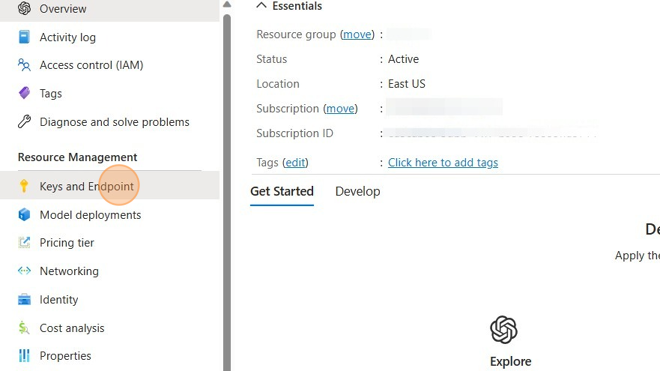
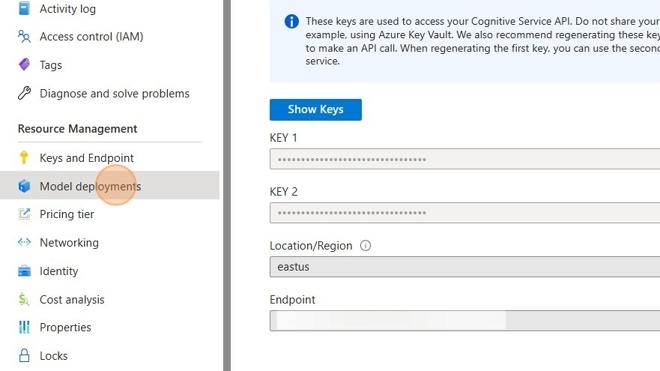
8. Click "Keys and Endpoint."

Screenshot of: Click "Keys and Endpoint."

9. Click the "copy to clipboard" button for Key 1.

Screenshot of: Click the "copy to clipboard" button for Key 1.

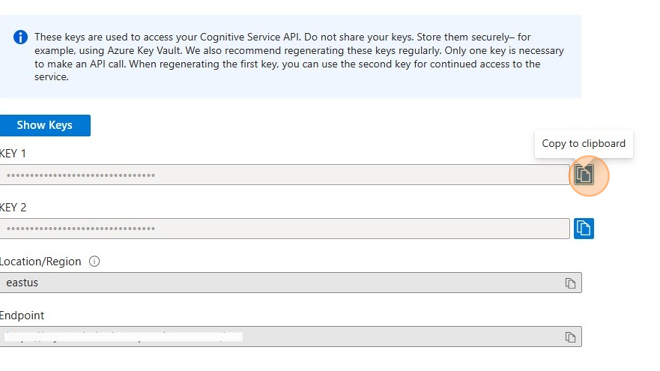
10. Switch to your Bubble plugin setup and paste the key into the "api-key (shared headers)" and "api-key (shared headers) - dev" text boxes.

Screenshot of: Switch to your Bubble plugin setup and paste the key into the "api-key (shared headers)" and "api-key (shared headers) -  dev" text boxes.

11. Switch back to your Azure OpenAI Service "Keys and Endpoints" tab. Click the "copy to clipboard" button for Endpoint.

Screenshot of: Switch back to your Azure Open AI Service "Keys and Endpoints" tab.  Click the "copy to clipboard" button for Endpoint.

12. Switch to your Bubble plugin setup and paste the endpoint into the "endpoint (path)" and "endpoint (path) - dev" text boxes.

Screenshot of: Switch to your Bubble plugin setup and paste the endpoint into the "endpoint (path)" and "endpoint (path) - dev" text boxes.

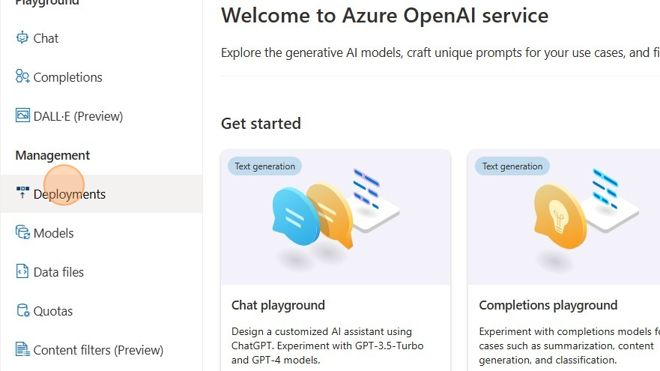
13. Switch back to your Azure OpenAI Service tab, and click "Model Deployments."

Screenshot of: Switch back to your Azure Open AI Service tab, and click "Model Deployments."

14. Click the "Manage Deployments" button to go to Azure OpenAI Studio.

Screenshot of: Click the "Manage Deployments" button to go to Azure OpenAI Studio.

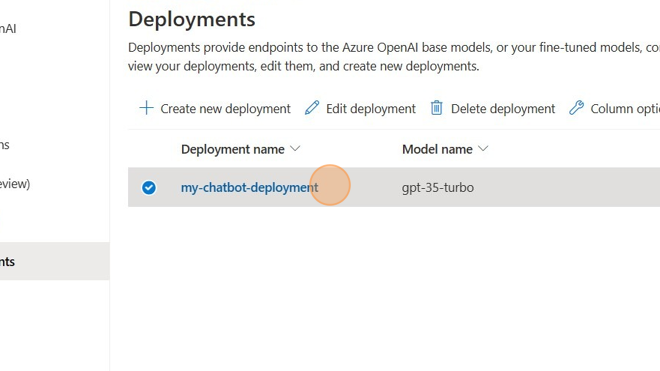
15. If necessary, select the directory and subscription, then the resource used in the previous steps. Then, click "Deployments" from the Management group.

Screenshot of: If necessary, select the directory and subscription, then the resource used in the previous steps. Then, click "Deployments" from the Management group

16. Copy the name of your desired deployment to the clipboard.

Screenshot of: Copy the name of your desired deployment to the clipboard.

17. Switch to your Bubble plugin setup and paste the deployment name into the "deployment-id(path)" and "deployment-id(path) - dev" text boxes.

Screenshot of: Switch to your Bubble plugin setup and paste the deployment name into the "deployment-id(path)" and "deployment-id(path) -  dev" text boxes.

18. Click "Preview" to preview the application.

Screenshot of: Click "Preview" to preview the application.

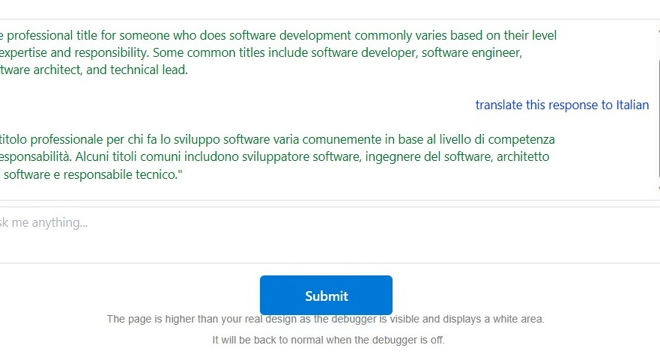
19. Test your new chatbot out! When you are done, feel free to look at the workflows to see how the plugin works with the application and interacts with the APIs. You should also remove the documentation from the top of the page and style to your preferences. You've created a no-code chatbot!

Screenshot of: Test your new chatbot out!  When you are done, feel free to look at the workflows to see how the plugin works with the application and interacts with the APIs. You should also remove the documentation from the top of the page and style to your preferences. You've created a no-code chatbot!


5 Comments
Version history
Last update:
‎Jun 16 2023 02:13 PM
Updated by: